

Views: 0 Author: Site Editor Publish Time: 2026-06-27 Origin: Site


Upgrading your bathroom often hinges on finding the perfect balance between style and everyday functionality. You want modern fixtures to look visually stunning while offering robust daily utility. However, installing these architectural upgrades involves managing highly fragile materials, significant glass weight, and frequently, high-voltage electrical components. These complex variables make the installation process a critical evaluation stage for any bathroom remodel. Getting the structural mount right directly impacts your adherence to local electrical codes. It also guarantees long-term physical safety for everyone using the room. Our comprehensive guide provides a transparent, risk-aware framework to help you properly prepare, mount, and ultimately secure the unit. We will walk you through essential structural feasibility assessments, precision wall leveling techniques, and safe electrical routing protocols. You will learn exactly how to approach this home improvement project confidently and safely.
Mounting method dictates complexity: Surface-mounting requires structural wall reinforcement, while recessed installation demands invasive drywall and stud modification.
Load-bearing is non-negotiable: Aluminum cabinets are lighter than steel, but integrated mirrors and internal storage require anchoring directly to wall studs or using heavy-duty toggle bolts.
Electrical compliance: LED or defogger-equipped models typically require a dedicated 120V circuit and adherence to local bathroom safety zones (e.g., IP44 standards).
Two-person minimum: The risk of hinge strain or glass shattering requires a dual-person lift for the final mounting stage.
Evaluating your bathroom wall structure is the first vital step. The installation method you choose will dictate your timeline, labor requirements, and tool selection. Both surface and recessed configurations offer distinct advantages. Homeowners must assess their specific wall anatomy before committing to a mounting style.
Surface-mounted installations sit directly on the finished wall. They provide an excellent choice for quick retrofits. You avoid cutting into drywall or altering interior framing. This method works exceptionally well on solid concrete or brick walls. The cabinet chassis will protrude four to six inches into the room. Maintenance remains straightforward because all hinges and mounting brackets stay accessible.
Recessed installations create a sleek, flush aesthetic. The unit sits inside the wall cavity itself. This approach requires a minimum wall depth ranging between 3.5 to 4 inches. You must physically cut away drywall. Contractors frequently discover plumbing vents or electrical wires hidden behind the sink area. Rerouting these internal utilities demands specialized plumbing or electrical expertise.
Time and labor investments differ drastically between the two methods. Surface mounts usually take a few hours. A competent DIYer can handle the job using standard household tools. Recessed mounting often necessitates hiring professional contractors. Structural alterations, header framing, and utility rerouting significantly increase project complexities. Compare these resource requirements carefully against your desired aesthetic outcome.
Feature | Surface-Mounted | Recessed Installation |
|---|---|---|
Wall Penetration | Minimal (anchors only) | High (cuts through drywall) |
Labor Intensity | Low to Moderate | High (may require pros) |
Space Intrusion | Protrudes 4-6 inches | Nearly flush to the wall |
Maintenance Access | Easy exterior access | Requires unit removal |
Proper preparation mitigates common installation hazards. The right tools prevent structural failures and aesthetic damage. Gathering your equipment beforehand ensures a smooth workflow. You will avoid scrambling for parts while holding heavy glass components.
Standard toolkits rarely suffice for heavy bathroom fixtures. You need specific equipment designed to handle dense wall materials and sheer weight limits. Gather the following tools before beginning:
A reliable electronic stud finder
A heavy-duty laser level for precise horizontal tracking
A power drill equipped with appropriate speed settings
Masonry or wood bits matched to your wall type
Standard plastic anchors fail under dynamic loads. Opening and closing mirrored doors applies outward leverage against the wall. Specify heavy-duty toggle bolts for hollow drywall installations. If you drill into tile or concrete, utilize specialized masonry anchors. Metal expansion sleeves offer superior grip strength inside solid substrates.
Ergonomics play a huge role in daily usability. The standard ergonomic height places the center of the mirror approximately five feet (60 inches) from the floor. Alternatively, measure 8 to 10 inches above the highest point of your sink faucet. This gap prevents water splashing directly onto the bottom chassis.
Perform strict clearance checks before marking any holes. Ensure the cabinet doors can swing fully open to 90 or 120 degrees. They must not strike overhead light fixtures, adjacent side walls, or tall faucet handles. Mapping this zone using painter's tape helps visualize the final spatial footprint.
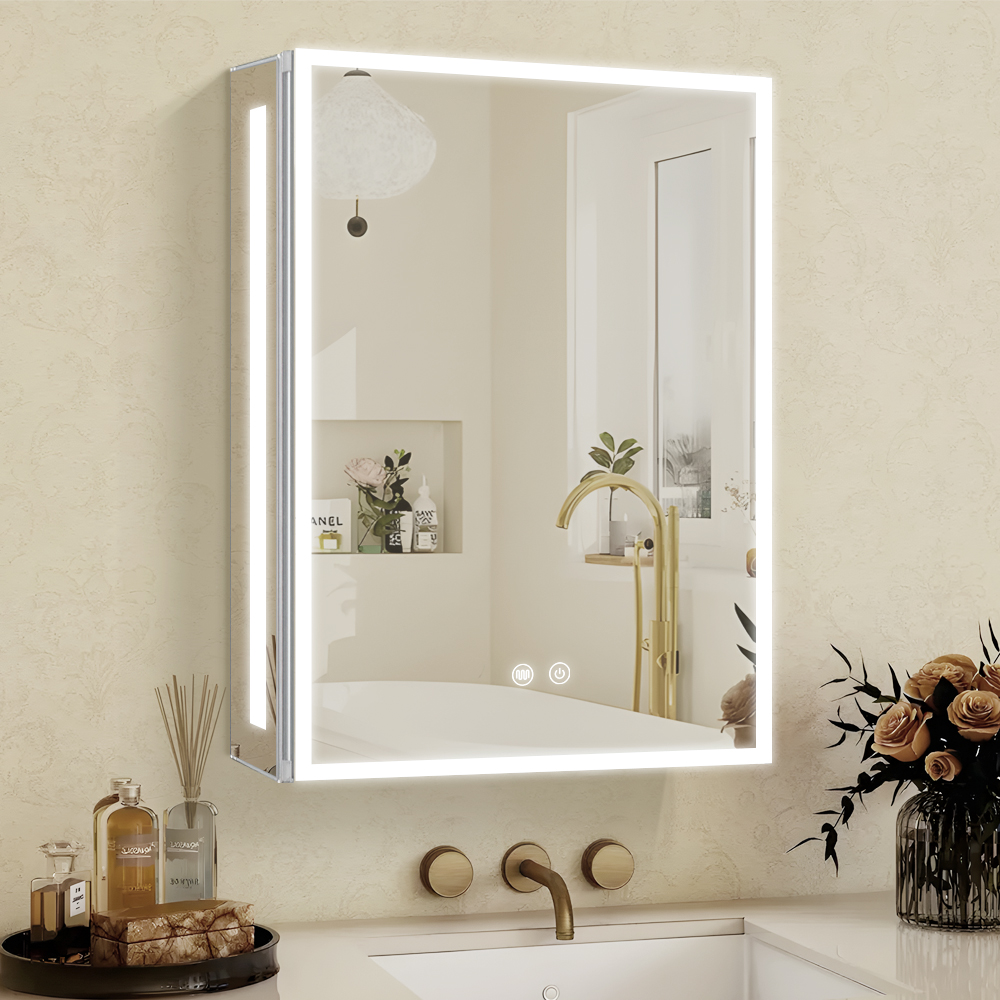
The mounting sequence demands patience and precision. A properly installed Wall Mounted Aluminum Mirror Cabinet transforms your bathroom interface. Following a rigid step-by-step process protects the product from accidental damage. It also protects you from physical strain.
Never attempt to mount a fully assembled unit. You must remove all internal glass shelves first. Unclip the mirrored doors from their internal hinges carefully. Set these fragile pieces safely aside on a soft blanket. This simple preparation step reduces your total lifting weight by up to 50 percent. It also protects fragile glass edges from torque damage if the frame twists slightly during mounting.
Most premium units utilize a French cleat hanging system. This interlocking metal bracket distributes weight evenly across the wall. Use your stud finder to locate and mark the wooden wall studs. Set your laser level across these marks.
Drill the bottom mounting bracket directly into at least two studs. If you install the unit over ceramic tile, apply a bead of silicone sealant directly into the drilled holes. The silicone seals the penetration point. It prevents ambient shower moisture from rotting the wooden studs behind the tile.
This stage requires a second pair of hands. Lift the bare aluminum frame smoothly onto the bottom wall bracket. The internal cleat should lock firmly into place. Do not let go immediately. Hold the chassis steady while your partner verifies the frame sits perfectly plumb and level. Once confirmed, use a pencil to mark the top anchoring holes through the interior back panel.
Drill the required top pilot holes. Secure the top interior screws tightly against the wall. The frame should now feel completely rigid. Carefully lift the mirrored doors back into place. Reattach them to the metal chassis. Adjust the multi-way hinges using a manual screwdriver to achieve uniform gaps around the door perimeters. Finally, insert the shelving clips and slide the glass shelves into their designated slots.
Modern fixtures frequently include integrated lighting, internal outlets, and defogger pads. Wiring these features safely requires strict adherence to building codes. Water and electricity create fatal hazards if managed improperly. You must understand your local safety standards.
Verify the specific IP rating (Ingress Protection) stamped on the chassis. An IP44 rating denotes protection against splashing water from any direction. This standard matches standard bathroom zone requirements perfectly.
Homeowners often debate hardwiring versus utilizing standard plug-in models. Hardwiring provides a seamless, professional aesthetic. It eliminates ugly cords draping across the vanity. However, hardwiring requires pulling Romex cable safely through the wall cavity prior to mounting. An elegant Aluminum Mirror Cabinet demands an equally elegant wiring solution.
Safety begins at the breaker panel. Always turn off the main breaker powering the bathroom circuit. Test the wires using a non-contact voltage tester before touching anything bare. Use appropriately sized wire nuts to join the connections inside an approved junction box. Many premium models feature an integrated junction compartment built directly into the rear chassis.
Connect the live (black), neutral (white), and ground (green or bare copper) wires securely. Pro Tip: Never pinch the main wiring harness between the rigid aluminum chassis and the hard drywall. Pinched wires degrade over time. Ensure all power cables pass cleanly through the designated knockout holes located on the back panel.
Even meticulous DIYers encounter unexpected hurdles. Bathroom environments harbor hidden structural anomalies. Recognizing these potential pitfalls early saves immense frustration. You can deploy specific mitigation tactics to protect your investment.
Issue: Modern home construction rarely yields perfectly flat drywall. Walls frequently bow inward or bulge outward. Tightening a highly rigid metal frame against a bowed wall transfers stress directly into the chassis. This force warps the frame. Doors begin to misalign, and glass mirrors can crack under the sustained tension.
Solution: Employ composite shims. Slip small shims behind the mounting points wherever gaps exist between the metal frame and the wall. Fill the voids before fully torquing the final mounting screws. This maintains the structural integrity of the chassis.
Issue: High humidity environments accelerate chemical reactions between dissimilar metals. Driving standard zinc or cheap steel screws directly against a raw aluminum frame invites galvanic corrosion. Moisture acts as a catalyst. The steel will begin to rust reactively, compromising the anchor point and staining the wall.
Solution: Utilize the exact factory-provided hardware found in the original packaging. If you must substitute aftermarket screws due to specific wall conditions, ensure you purchase stainless steel variants. Stainless steel resists reactive rusting and maintains long-term shear strength.
Issue: Soft-close European hinges rely on delicate internal threading. Aggressive adjustments strip these fine metal threads easily. Once stripped, the door will never sit flush against the frame.
Solution: Leave your power drill on the workbench during reassembly. Use manual hand screwdrivers for all final door alignments. Turn the adjustment screws incrementally. A quarter-turn usually provides enough movement to square the door perfectly.
Achieving a successful installation relies entirely on accurate weight distribution across the wall studs.
Level the unit precisely to ensure soft-close hinges function without grinding or binding.
Manage electrical routing meticulously. Prioritize IP-rated junction boxes to eliminate moisture-related shock hazards.
Treat your new hardware gently. The lifespan of your rust-resistant metal fixture depends heavily on proper anchor selection and careful hinge calibration.
Review your product specification sheets for exact weight metrics before finalizing any structural alterations.
Consult a certified local electrician immediately if you feel unsure about hardwiring an integrated lighting circuit.
A: While technically possible using heavy-duty toggle bolts (rated for 50+ lbs each), anchoring to at least one wooden or metal stud is strongly recommended to support the dynamic weight of opening and closing heavy mirrored doors.
A: Yes. If the cabinet features integrated lighting, defogger pads, or internal outlets, the metal chassis must be properly grounded to the home’s electrical system to prevent shock hazards.
A: Most modern aluminum cabinets use 3-way adjustable European hinges. Use a Phillips screwdriver to turn the adjustment screws on the hinge body, which will move the door left/right, up/down, or in/out until perfectly aligned.
A: Aluminum is naturally highly resistant to rust (oxidation), making it superior to steel for humid bathroom environments. However, ensure the mounting hardware used is stainless steel to prevent localized rust at the drill points.


